

Formech Technical Newsletter - Casting Resin for Tooling
Formech Technical Newsletter - Casting Resin for Tooling
In this issue we focus on how to cast up resin for vacuum forming production tooling.
Resin is particularly useful when you require a quick tooling solution that can deliver professional results. Depending on which resin you choose, you can have a production tool ready within one hour. The ability to produce quick, cost effective production tools is definitely one of the main benefits of using this method.
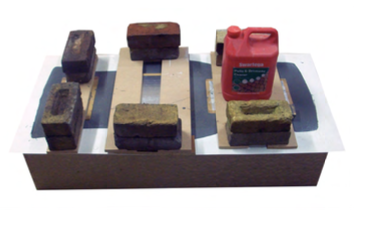
Multiple resin tool example
10000 vacuum formed parts are required in one week formed in 3mm HIPS
Typical vacuum forming cycle time – 3 minutes: 1 tool = 10000 cycles = 30000 minutes = 500 hours
Alternatively you could produce multiple resin tools.
Typical vacuum forming cycle time – 3 minutes: 10 tools = 1000 cycles = 3000 minutes = 50 hours
Although the example does not cover everything, it does give you an indication of the time savings associated with casting up multiple resin tools, compared to casting aluminium in a foundry or producing CNC machined tools out of aluminium. When mounting tools, use twinthread countersunk screws to mount the tools to a baseboard.
What type of resin to use
We usually recommend epoxy resin, although polyurethane resins can also be used to good effect.
> Alchemie EP426 two part epoxy casting resin. Shore hardness: 90-95
Pot life: 120-180 minutes
Website: alchemie.com
> PU376 two part polyurethane casting resin. Shore hardness: 82
Pot life: 4-5 minutes
Website: alchemie.com
> Sika G32 Biresin two part epoxy casting resin (sika.com)
The polyurethane resins are usually fast acting and can be demoulded within the hour. The epoxy resins usually take at least 12 hours to cure, before they can be demoulded. Epoxy resins are generally more hard wearing and can be screwed down to baseboards.
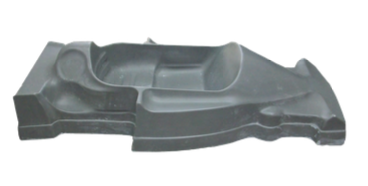
The casting process
1- Vacuum Forming
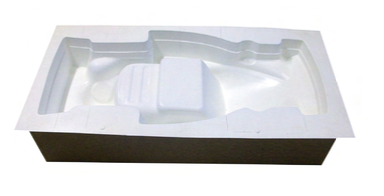
Vacuum form over your master pattern or tool and turn your vacuum forming upside down ready for casting.
2- Support
Support the formings on the underside to stop deformation caused by the weight of the resin when poured into the forming.
3. Release agent
Apply a wax release agent either by brush or spray can to the inside of the vacuum forming. When this has dried polish the surface with a cloth or duster.
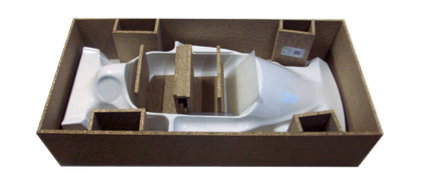
4. Foam blocks
Position foam blocks and wooden strips within forming to reduce the amount of resin used. The foam is covered with packaging tape & release agent.
5. Pour the resin
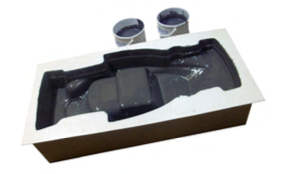
Always pour into the lowest part of the vacuum forming first and start with a thin coating of mixed resin. Brush the resin all over the surface and leave for 15 minutes until any bubbles have risen to the surface (slow cure epoxy resin only). A stipple action with the brush will help to eliminate air bubbles.
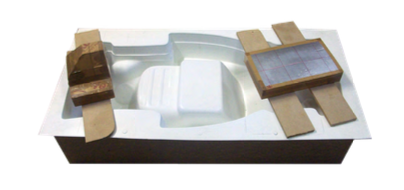
6. Position blocks
Position the Polyurethane foam blocks and apply weights. Pour the remainder of the resin to the correct level and top up as required. Leave the resin to harden for the correct time. Epoxy resins can take up to 24 hours before they can be demoulded. P.U resins can often be demoulded after 1 hour.
7. Break out
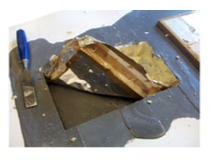
Break out the foam inserts and cast resin tool from the vacuum forming
to give you your production tool.
8. First post cure
Cure the resin tool for the first period of 4 hours at 40C (epoxy resin).
9. Sanding + drilling
Drill the vacuum holes as required – typically 1mm – 1.5mm diameter after the first curing session. This is so that the resin is not too soft, so that it clogs the drill and not too hard, so that it blunts the drill. Use either 1mm or 1.5mm long reach drill bits. These are expensive, but with care they will last.
10. Second and third post cure
Cure the resin tool 3 hours at 60C and then 2 hours at 80C (epoxy resin). If you do not cure the resin tools properly, then they can start to collapse under the force of vacuum, during the vacuum forming process. Shrinkage is usually less than 0.1% with epoxy resing. Finally sand down the resin tools until they are smooth.
Formech Technical Newsletter compiled by: Martin Smith, Senior Technical Support Manager, [email protected]
>>> Download PDF here